Quick Reference
Introduction
The Flywheel SDK is a python toolbox that provides programmatic access to the Flywheel API endpoints. The quick reference section provides a searchable summary of common SDK calls with basic examples.
Setup
API Key
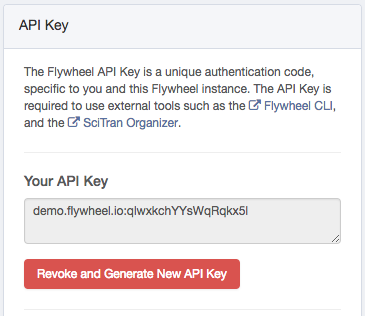
The SDK requires an API key. You can find and generate your key on the Flywheel profile page. It will look like this:
Making API Calls
In order to make API calls, you will need to create an instance of the Flywheel client:
# import flywheel package
import flywheel

# Create client
fw = flywheel.Client('my-key')
Once you have a client instance, you can interact with the system. For instance, you could get information about yourself:
self = fw.get_current_user()
print('I am %s %s' % (self.firstname, self.lastname))
Using CLI Credentials
If you’ve logged in using the CLI, you can create a client instance without using an API key. This is useful when sharing SDK scripts for others to use.
# Create client, using CLI credentials
fw = flywheel.Client()
Connecting to your Flywheel Client
There are two primary ways to connect to your flywheel Client:
With the CLI: If you have already installed the flywheel CLI, and have logged in (as described here), then you may access your instance’s API with the following command:
import flywheel
from pprint import pprint

# Access the flywheel API
fw = flywheel.Client()

# Check user Info
user_info = fw.get_current_user()

print(f"Firstname: {user_info.firstname} \n"
      f"Lastname: {user_info.lastname} \n"
      f"Email: {user_info.email}")
Without the CLI: If you do not have the CLI installed or have not logged in to your instance with it, you can specify the API key you would like flywheel to use. The flywheel API key is usually of the following format:
<flywheel instance URL>:<numbers_and_letters>
for example:
upenn.flywheel.io:d9Ee3fjDeXwaeHp0tff8
(Note that this API key is fake. Don’t try to use it.)
This string should be considered like a password, and should be kept secret.
You can log in to the instance associated with this key using the following code:
import flywheel
from pprint import pprint

# Enter your API key into python and pass that
# value in when calling flywheel.Client()
api_key = "<MY_FLYWHEEL_API_KEY>"
fw = flywheel.Client(api_key)

# Check user Info
user_info = fw.get_current_user()

print(f"Firstname: {user_info.firstname} \n"
      f"Lastname: {user_info.lastname} \n"
      f"Email: {user_info.email}")
Flywheel Objects
The Group Object
The object returned by these finder functions is a python dictionary with a number of keys:
_id: the group ID, same as label
label: The group label, same as ID
permissions_template: A template of default permissions to give new projects
roles: Any roles the current API key has in the group
permissions: A list of users in the group and their assigned roles/permissions
created: When the group was created
modified: When the group was last modified
tags: Any user assigned tags
You can view the structure of this dictionary using pprint:
The Project Object
The project object (Say that ten times fast!) is a python dictionary. These are the most common key/value pairs you’ll likely use:
label: The project label
info: A dictionary representing any metadata information added to the project by users
description: A description of the project
group: The group to which the project belongs
_id: The project ID, given as a unique flywheel letter/number identification string
parents: Any parent objects to the container. For projects, this is only the group
created: The date which the project was created
modified: The date which the project was last modified
permissions: A list of users who have access to this project, and their permissions
files: A list of any non-acquisition file attached to the project
tags: Any tags added to the project
analyses: A list of any project-level analyses
Note that the info, files, and analyses fields can be very long, depending on the number of items in each.
The Subject Object
_id: The subject ID
project: The unique Flywheel ID of the parent project
firstname: The subject’s first name
lastname: The subject’s last name
sex: The subject’s sex
cohort: The cohort the subject belongs to
type: The type of subject (“Human”, “Animal”, or “Phantom”)
race: The subject’s race
ethnicity: The subject’s ethnicity
species: The subject’s species
strain: The subject’s strain
label: The subject’s label in flywheel
tags: Any tags added to the subject
info: Custom metadata added to the subject
files: Non-acquisition/image files attached to a subject
parents: The subject’s parent containers in flywheel
created: The date the subject was created
modified: The date the subject was last modified
permissions: A list of users who have access to this subject and their permissions
notes: Any notes added to the subject
analyses: Any analyses attached to the Subject container.
The Session Object
label: The name of the session in Flyhweel
info: Any additional metadata information added to the session
project: The unique Flywheel ID of the project that this session belongs to
subject: The subject object (and it’s metadata) associated with the session
age: The age of the subject associated with the session
weight: The weight of the subject associated with the session
_id: The unique Flywheel ID for this session
info_exists: Indicates if there is any metadata in the “info” section
parents: The container’s parents object
created: The date/time that the Session was created in Flywheel
modified: The date/time that the Session was last modified in Flywheel
permissions: A list of users who have access to this session, and their associated permissions
group: The groupID associated with the session
files: A list of any files attached to the session that are not part of the child acquisitions
notes: Any notes added by users to the session
tags: Any tags added by users to the session
analyses: A list of any analysis containers associated with the session
acquisitions: A finder object with all the sessions’s acquisitions
Finding Objects
The first thing you may want to do is locate data in flywheel. There are a number of ways to find and view data on flywheel. The most basic way is to have the client return all containers of a certain type:
Finding Data
Flywheel has two primary methods to find data using the SDK:
Finders
Queries
Finders
Each container type has it’s own finder in flywheel. It their most basic form, finders will return all possible matches. Finders are called with the .find() method.
To specify what container type you’re looking for, it can be called after a container type from the flywheel client:
fw.projects.find()
fw.subjects.find()
fw.sessions.find()
etc.
In this case, each finder will return EVERY project/subject/session that you have access to on the site.
This is equivalent to simply calling:
fw.projects()
fw.subjects()
fw.sessions()
Until you place filter arguments in find()
You can pass in filters to limit the containers returned. The filters can set conditions based off of the containers’ metadata. For example, if you want to only get subjects that belong to a certain project, you can filter for that property as follows:
fw.subjects.find(‘project=<PROJECT_ID>’)
Alternatively, you can search for all subjects DIRECTLY from that project’s container object:
project = fw.get_project('<PROJECT_ID>')
subjects = project.subjects.find()
# OR
subjects = project.subjects()
Further, finders can be applied here as well:
` subject = project.subjects.find(‘created>2018-10-31’)`
Will return all subjects created after October 31st, 2018, in the given project.
find_first & iter_find
There are two other varieties of finders:
find_first()
iter_find()
These two behave exactly as find() in that they can be called directly from the client:
fw.subjects.find_first()
fw.sessions.iter_find()
or from a container:
project = fw.get_project('<PROJECT_ID>')
subjects = project.subjects.find_first()
sessions = project.sessions.iter_find()
Additionally, they can take filter arguments just like find():
fw.subjects.find_first(“label=’My Subject’”)
They differ in what they return.
*find_first* stops searching flywheel when it finds the first match, and returns that match. This can be useful to simply see if your search is working, and if ANY data is matching to it.
*iter_find* returns an iterator. This can be useful for searches that return large numbers of containers. find() will retrieve the metadata of every container that matches the search filter, generate a list of that data for python, and return that to your terminal. This can take time when hundreds or thousands of search results need to be returned. iter_find() returns an iterator that sends the metadata for the matching containers one at a time, rather than all at once.
This can be useful when there is some sort of processing loop that you’re doing to your data.
For example, appending a keyword to all subjects created after a certain date:
project = fw.get_project('<PROJECT_ID>')

# INCORRECT - This method will be slow if there is a large number of subjects
subjects = project.subjects.find('created>2019-09-09')
for sub in subjects:
    label = sub.label
    sub.update({'label':f"old_cohort_{label}"})


# CORRECT - This method will be faster than the one above if there is a large number of subjects
subjects = project.subjects.iter_find('created>2019-09-09')
for sub in subjects:
    label = sub.label
    sub.update({'label':f"old_cohort_{label}"})


sessions = project.sessions.iter_find()
Queries
Queries are an extension of our advanced search function in the SDK.
You can generate queries just like you’d generate an advanced search, and passing the query into the fw.search() function:
age = 64

query = f'session.age >= 0 AND session.age <= {age} AND ' \
        f'project.label = Sample AND ' \
        f'file.classification.Measurement = T1 AND ' \
        f'file.info.PatientIdentityRemoved = YES'

results = fw.search({'structured_query': query, 'return_type': 'acquisition'}, size=10000)
you must specify the query and the return type. The return type specifies which container type it will return, regardless of what the query criteria is. This will return any containers who have a parent or child container that the query criteria satisfies.
the size parameter specifies the number of results to return, typically limited to 100, with a maximum of 10000.
As an example, the following query would return all subjects in the project labeled “Test Project”:
query = 'project.label = "Test Project"'
results = fw.search({'structured_query': query, 'return_type': 'subject'}, size=10000)
And likewise, the following query would return all subjects who have a child acquisition named “multi_echo”:
query = 'acquisition.label = multi_echo'
results = fw.search({'structured_query': query, 'return_type': 'subject'}, size=10000)
Groups
View All Groups
To view all the groups your account has access to on this flywheel instance:
all_groups = fw.groups()

print('Flywheel Groups:')
for group in all_groups:
      print(f"\t{group.id}")
Find a Specific Group
If you would like to examine a specific group in more detail, you can directly load that one group with the following:
group_name = 'scien'

group = fw.get(group_name)
# Equivalently, but possibly slower:
group = fw.lookup(group_name)
group = fw.groups.find(f"_id={group_id}")
Projects
View All Projects
To view all the projects your account has access to:
projects = fw.projects()

print('Flywheel Projects:')
for project in projects:
      print(f"\t{project.label}")
View All Projects In a Group
Using a Group ID
To view all projects in a specific group that your account has access to using a group id:
group_id = 'scien'
projects_in_group = fw.projects.find(f"group={group_id}")

print(f"Flywheel Projects in {group_id}:")
for project in projects_in_group:
      print(f"\t{project.label}")
The flywheel finder .find() can be usd to search for values in the Project Object Metadata. Only keywords found in the object can be used in the query. More details on flywheel finders can be found here [LLL].
Using a Group’s Project List
If you have already captured a group object (See Find a Specific Group), you can call projects() to return all projects in that group:
group_id = 'scien'
group = fw.get(group_id)

projects_in_group = group.projects()
print(f"Flywheel Projects in {group_id}:")
for project in projects_in_group:
      print(f"\t{project.label}")
View One Specific Project
Using the Client Projects Finder
To view one specific project in a group using the project label and group ID:
group_id = 'scien'
project_label = 'cmrr_deid'

one_project = fw.projects.find(f"group={group_id},label={project_label}")
# Or Equivalently:
one_project = fw.projects.find_first(f"group={group_id},label={project_label}")
one_project = fw.projects.find_one(f"group={group_id},label={project_label}")
one_project = fw.lookup(f"{group_id}/{project_label}")
The differences the finders/lookup functions are covered in more detail here
Note that if a group has multiple projects with the same name, it will be easier to access a project using it’s unique Flywheel ID. If you know a project’s flywheel ID, you can access it directly using the steps in the next section:
Using a Group’s Project Finder
If you already have the group object loaded that the project belongs to, it may be faster to locate the project using the group.projects.find() method:
group_id = 'scien'
group = fw.get(group_id)

project_label = 'cmrr_deid'
one_project = group.projects.find(f"label={project_label})
# Or Equivalently:
one_project = group.projects.find_first(f"label={project_label})
one_project = group.projects.find_one(f"label={project_label})
Get a Project’s Flywheel ID
Flywheel assigns unique IDs to every object. This ID can be useful for looking up data, as a single group can have multiple projects with the same name, but the ID will always be unique. The project ID is stored in the Project Object Metadata, and can be accessed in the following way:
   group_id = 'scien'
   project_label = 'cmrr_deid'

   one_project = fw.lookup(f"{group_id}/{project_label}")

   project_id = one_project.id

..
This ID can also be found in the hyperlink shown in your browser’s navigation bar when viewing that project on flywheel:
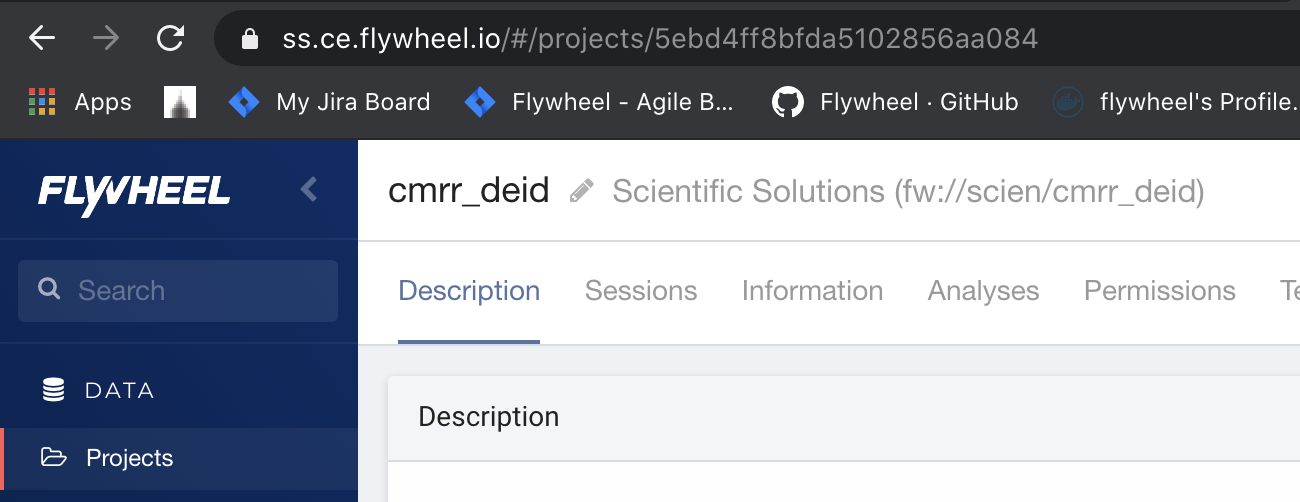
While the “finder” and “lookup” methods need to query flywheel for a project label, you can use the flywheel ID to directly retrieve a project, making this the fastest option for accessing data:
project = fw.get(project_id)
You can use the fw.get() method for Projects, Subjects, Sessions, and Acquisitions [LLL]
Subjects
Finding All Subjects in a Project
Using a project’s subject list
To view all subjects in a specific project we use the project ID to get the project object, as it contains information on all subjects within itself. If you have the project object, or know the project ID, you can print all subjects within the project as follows:
project_id = '5ebd4ff8bfda5102856aa084'
project = fw.get(project_id)

subjects_in_project = project.subjects()
print(f"{len(subjects_in_project)} Subjects found")
for subject in subjects_in_project:
      print(f"\t{subject.label}")
A project may also have a large number of subjects, so it may be desirable to use the subject iterator to loop through them to save on time waiting for the API to respond:
project_id = '5ebd4ff8bfda5102856aa084'
project = fw.get(project_id)

subjects_in_project = project.subjects.iter()
print(f"{len(subjects_in_project)} Subjects found")
for subject in subjects_in_project:
      print(f"\t{subject.label}")
View All Subjects in a Project That Meet Filter Criteria
You can use the Flywheel finders to search for subjects with specific metadata values. For example, you can search for all male subjects under the age of 30:
project_id = '5ebd4ff8bfda5102856aa084'
project = fw.get(project_id)

subjects_in_project = project.subjects.find("age<30,sex=male")
print(f"{len(subjects_in_project)} Subjects found")
for subject in subjects_in_project:
      print(f"\t{subject.label}")
If the subject has a custom metadata field in the “info” section, that too can be used with flywheel finders. For example:
subjects_in_project = project.subjects.find("info.custom_info_field=<desired_value>")
View one subject in a Project
Using a Project’s Subject Finder
Or if you have the project object, you can query that, using only the desired subject label:
project_id = '5ebd4ff8bfda5102856aa084'
project = fw.get(project_id)

subject_label = 'ExampleSubject'
subject_in_project = project.subjects.find(f"label={subject_label}")
Sessions
View All Sessions in a Project
Using a Project’s Session List
If you already have the project object, you can view all sessions in a specific project using the project’s session list:
project_id = '5ebd4ff8bfda5102856aa084'
project = fw.get(project_id)

sessions_in_project = project.sessions()

print(f"Flywheel Sessions in {project_id}:")
for session in sessions_in_project:
      print(f"\t{session.label}")
to call the iterator from the project:
project_id = '5ebd4ff8bfda5102856aa084'
project = fw.get(project_id)

sessions_in_project_iterator = project.sessions.iter()

print(f"Flywheel Sessions in {project_id}:")
for session in sessions_in_project_iterator:
      print(f"\t{session.label}")
View all Sessions for one Subject
Using a Subject’s Session List
If you already have the subject object, you can get the sessions as follows:
subject_id = '5ebd50b5bfda5102996aa0e5'
subject = fw.get(subject_id)
subject_sessions = subject.sessions()
View all Sessions in a project with a specific key
It’s sometimes useful to retrieve all sessions of a certain type (‘Baseline’, or ‘Resting’). If this in formation is stored in the session label, it can easily be retrieved as follows:
project_id = '5ebd4ff8bfda5102856aa084'
project = fw.get(project_id)

sessions = project.sessions.find("label=baseline")
print(f"{len(sessions)} Sessions Found:")
for ses in sessions:
    print(f"\t{ses.label})
Regular expressions can also be used with the =~ symbol, in case for some reason each subject has a slightly different session name, but that always fits a pattern.
For example, assume that every subject has two resting state scans, each performed in a different session:
Session Names: |
|---|
resting-baseline |
resting-followup |
func-baseline |
func-followup |
If we were only interested in all baseline sessions, we could perform the following search:
project_id = '5ebd4ff8bfda5102856aa084'
project = fw.get(project_id)

sessions = project.sessions.find("label=~.*baseline")
And if we only wanted resting state sessions, we could perform the following:
project_id = '5ebd4ff8bfda5102856aa084'
project = fw.get(project_id)

sessions = project.sessions.find("label=~resting.*")
Read more about using finders here.
Getting One Session
From the Flywheel Instance URL
A session ID can be found in the flywheel URL when in the “session” tab of a project, and in session view mode, as shown below:

The session can be loaded directly with fw.get(session_id).
From a Subject’s Session Finder
In this example, because the subject is specified with its unique flywheel string, there is no need to specify the group and project - that information is stored within the subject.
subject_id = '5efcdf14957ea0030bc8a8e7'
ses_label = 'Resting-baseline'
subject = fw.get(subject_id)

session = subject.sessions.find(f"label={ses_label}")
Acquisitions
View All Acquisitions in a Session
Using a Sessions’s Acquisition List
Each Session object has an “Acquisition” finder object with every acquisition for that session. To view all Acquisitions in a Session, use the following:
session_id = '5efcdf14957ea0030bc8a8e7'
session = fw.get(session_id)
acquisitions = session.acquisitions()

print(f"{len(acquisitions)} acquisitions Found:")
for acq in acquisitions:
    print(f"\t{acq.label})
Finding Specific Acquisitions
Using a Sessions’s Acquisition Finder
In Flywheel, the only container with an Acquisition finder is the Session container. A Session’s Acquisition Finder can be used to locate all acquisitions in that Session, or to filter them using the finder. For example, looking for any Acquisitions with the word “resting” in the label can be done as follows:
session_id = '5efcdf14957ea0030bc8a8e7'
session = fw.get(session_id)
acquisitions = session.acquisitions.find('label=~.*resting.*')

print(f"{len(acquisitions)} acquisitions Found:")
for acq in acquisitions:
    print(f"\t{acq.label})
Using the Client’s Acquisition Finder
The only other way to search for acquisitions is using the client’s finder. This can be useful if you want to find all acquisitions of a certain type in a project. For example, if you wanted to locate all acquisitions with the label “BOLD_task_checkerboard” in the project “checkerboard_study”:
project = fw.projects.find_one('label=checkerboard_study')
acquisition_label = "BOLD_task_checkerboard"
acquisitions = fw.acquisitions.find(f"parents.project={project.id},label={acquisition_label}')

print(f"{len(acquisitions)} acquisitions Found:")
for acq in acquisitions:
    print(f"\t{acq.label})
Files
Every container, from Projects to Acquisitions, can have files attached to them. At the Acquisition level, these files are simply the actual scan files, and are displayed in flywheel under the acquisition. For the other containers, these files can be found under their “attachments” sections.
Files are stored in lists, and have no searchable finder objects associated with them.
View All Files in an Acquisition
Because the project and session ID’s are readily available from the U.I., you’ll likely use these ID’s more than any other to find other containers. For example, to view all files in an acquisition, I would go through the session that the acquisition belongs to, since I can quickly copy and paste the session ID from the UI:
session = fw.get('5efce8d7957ea00337c8a8ab')
acquisition = session.acquisitions.find_one('label=rfMRI_REST_AP_Run1')

print(f"acquisition {acquisition.label} has the following files:")
for acq_file in acquisition.files:
    print(f"\t{acq_file})
Find One File in an Acquisition
Finding a file can be done quickly using list comprehension:
file_name = 'rfMRI_REST_AP_12.nii.gz'
file = [f for f in acquisition.files if f.name==file_name]
File names must be unique, so this is guaranteed to only return one file. However, it’s still in a python list due to the structure of the call, so to return the file object itself we make one slight change:
file_name = 'rfMRI_REST_AP_12.nii.gz'
file = [f for f in acquisition.files if f.name==file_name][0]
Find All Files of A Certain Type
Typically, an acquisition will have one DICOM file, and a number of NIFTI files, depending on the type of scan and the amount of preprocessing being done. To find nifti files in an acquisition, the following search can be performed:
filetype = 'nifti'
nifti_files = [f for f in acquisition.files if f.type==filetype]
Learn more about the supported file types here.
Learn more about working with files here.
Container Parents
Every Flywheel container, except for groups, have a parents metadata field. The parents field has the following keys:
- -acquisition
ID of the parent acquisition container
- -analysis
ID of the parent analysis container
- -group
ID of the parent group
- -project
ID of the parent project
- -session
ID of the parent session
- -subject
ID of the parent subject
If there is no parent container for a given field, the value is None. For example, a flywheel project will have a parent group, but no parent acquisiton, analysis, session, or subject. This is determined by the flywheel container hierarchy [LLL]
Creating Objects
Add Group
Create a new group, with an id of my_group and a label of My Test Group:
group_id = fw.add_group(flywheel.Group('my_group', 'My Test Group'))
Add Project
Create a new project that belongs to group_id with a label of My Test Project.
project = group.add_project(label='My Test Project')
Add Subject
Create a new subject with a label of Subject 01
subject = project.add_subject(label='Subject 01')
Add Session
Create a new session with a label of Session 01.
session = subject.add_session(label='Session 01')
Add Acquisition
Create a new acquisition with a label of Localizer, and upload a file.
acquisition = session.add_acquisition(label='Localizer')

acquisition.upload_file('localizer.nii.gz')
Setting Object Metadata
Once an object is created, it’s common to want to set or modify certain metadata parameters. Object metadata is stored in key/value pairs. Flywheel provides some default keys that all (or most) objects will share, such as “creation date”, “label”, and “parents”. There is also a custom field titled “info” that users can upload any amount custom key/value pairs to. These examples will show how to set some common parameters, as well as the custom info.
Metadata Format
Metadata is passed to flywheel in the form of key/value pairs using the update() function, with a few specific exceptions that will be covered. In the Python SDK, these key/value pairs are stored as dictionaries. For example, updating the label of a container in Flywheel would typically be done with the python dict {‘label’:’new_label’}, and called as follows:
container.update({'label':'new_label'})
Certain keys expect values of a certain data type. For example, label expects a string, and timestamp expects a timestamp from the datetime python package. Other metadata keys have special functions for modifying them, such as tags and notes. Finally, some metadata fields cannot be modified after creation, such as created, modified, and id.
Setting Acquisition Timestamps
Acquisition objects have timestamp fields that indicate the date of acquisition of the file. This is separate from the created and modified fields, which only pertain to the creation and modification of the file in Flywheel.
The timestamp object requires a dateteime object, with a timezone included. Working with timezones in any programming language can be…tricky to say the least. We recommend that you review some documentation on the subject, but a simple example will be provided below:
from datetime import datetime
import pytz


# Get a session object in flywheel:
session = fw.get_session('5f185ffd957ea0084cc8a85f')

# Create an acquisition
acq = ses.add_acquisition(label='MyNewAcquisition')

# get a timezone object, in this case UTC:
timezone = pytz.utc

# Create a timestamp for when the acquisition was taken (outside of flywheel)
# datetime can specify year, month, day, hour, minute, second, millisecond, and timezone:
# Let's set the date for January 1st, 4:30am, 2020.  Better times.
acq_time = datetime(2020, 1, 1, 4, 30, tzinfo=timezone)

# Now update the acquisition's timestamp
acq.update({'timestamp': acq_time})
Containers
Projects, Subjects, Sessions, Acquisitions and Analyses are all different types of Containers. Containers in Flywheel all support the following features:
Tags
Tags are concise labels that provide descriptive metadata that can be searched on. Available tags are managed on the Group.
# See tags on a session
session = fw.get(session_id)
print(', '.join(session.tags))

# Add a tag to a session
session.add_tag('Control')

# Remove a tag from a session
session.delete_tag('Analysis Required')
Notes
Notes are user-entered, human readable metadata attached to a container. They are timestamped and attributed to the user that entered them.
from pprint import pprint

# See notes on a session
session = fw.get(session_id)
pprint(session.notes)

# Add a note to a session
session.add_note('This is a note')

# Delete a note from a session
session.delete_note(session.notes[0].id)
Info
Info is free-form JSON metadata associated with a container or file.
from pprint import pprint

# Print the info for an acquisition
acquisition = fw.get(acquisition_id)
pprint(acquisition.info)

# Replace the entire contents of acquisition info
acquisition.replace_info({ 'splines': 34 })

# Add additional fields to acquisition info
acquisition.update_info({ 'curve': 'bezier' })

# Delete fields from acquisition info
acquisition.delete_info('splines')
Files
Files are a set of file attachments associated with a container. See also Dealing with Files.
from pprint import pprint

# List files on an acquisition
acquisition = fw.get(acquisition_id)

for f in acquisition.files:
  print('Name: %s, type: %s' % (f.name, f.type))

# Upload a file to an acquisition
acquisition.upload_file('/path/to/file.txt')

# Download a file to disk
acquisition.download_file('file.txt', '/path/to/file.txt')

# Files can also have metadata
pprint(acquisition.files[0].info)

acquisition.replace_file_info('file.txt', {'wordCount': 327})
File Classification
Flywheel supports an extensible, multi-dimenstional classification scheme for files. Each dimension of classification is referred to as an aspect. The available aspects are determined by the file’s modality.
For example, the MR modality provides the Intent, Measurement and Features aspects.
In addition, the Custom aspect is always available, regardless of modality.
from pprint import pprint

# Display the aspects defined in the MR modality
mr = fw.get_modality('MR')
pprint(mr)

# Replace a file's modality and classification
acquisition.replace_file_classification('file.txt', {
        'Intent': ['Structural'],
        'Measurement': ['T2']
}, modality='MR')

# Update a file's Custom classification, without changing
# existing values or modality
acquisition.update_file_classification('file.txt', {
        'Custom': ['value1', 'value2']
})

# Delete 'value1' from Custom classification
acquisition.delete_file_classification('file.txt', {
        'Custom': ['value1']
})
Timestamps [NEW]
Objects with timestamps and created/modified dates provide helper accessors to get those dates in the local (system) timezone, as well as the original timezone in the case of acquisition and session timestamps.
For example:
# Acquisition Timestamp (tz=UTC)
print(acquisition.timestamp.isoformat())

# Acquisition Timestamp (tz=Local Timezone)
print(acquisition.local_timestamp.isoformat())

# Acquisition Timestamp (tz=Original Timezone)
print(session.original_timestamp.isoformat())
Age at Time of Session [NEW]
Sessions have a field for subject age at the time of the session, in seconds. There are also helper accessors to get age in years, months, weeks and days.
For example:
# Subject age in seconds
print('Subject was {} seconds old', session.age)

# Subject age in years
print('Subject was {} years old', session.age_years)
Modifying Metadata On Existing Objects
Metadata on containers can be modified in the following ways:
update()update_info()replace_info()
These can be called on all containers and files that have metadata.
Update
Update will modify any metadta fieds specified, and leave all unspecified fields unchanged.
For example:
subject.update(sex='male', info={'key1':'val1'})
This will change (or add) the values for sex and key1 in the custom info of this
subject. All other values remain unchanged.
Update_info
update_info will allow you to pass in only a info metadata object. Any keys passed in will be updated if they exist, or added of they do not. All unspecified keys will remain untouched.
Note that this is equivalent to passing the metadata object to update() after the info key.
example:
session.update_info({'hair': 'black', 'group': 'control', 'IQ': 107})

# Equivalent to:
session.update(info={'hair': 'black', 'group': 'control', 'IQ': 107})
Replace_info()
This will completely replace ALL info with the metadata object passed into this argument. This means that all existing key/value pairs in the “info” section are erased, and reaplaced with this object.
For example, regardless of any data already present in acquisiton.info, after calling
this command, the only information present will be 'key1':'val1'
acquisition.replace_info({'key1':'val1'})
EXAMPLE: Set permissions for a list of users across multiple projects
Let’s say you have a list of user ID’s, and a permission level that they should have for all projects in a group:
User ID |
Permission Level |
|---|---|
admin |
|
rw |
|
admin |
|
… |
… |
ro |
NOTE that this code will assign access to EVERY project within a given group. Extreme caution must be taken when assigning user permissions to ensure that ONLY the correct access is given to the correct projects.
Setting Group Permissions
By default, You will have admin permissions on any group that you create. You may wish to modify these permissions, or add other users to the group.
Let’s add an example user to our group with “read write” permissions:
# Access Types:
# 'admin'- admin
# 'rw' - read/write
# 'ro'- read only

access_type = 'rw'
user_id = 'example@user.com
my_group.add_permission({'access':access_type, '_id':user_id})
Group Roles
Roles are different from group permissions - Roles apply to Project access within a given group. Roles and permissions is a detailed topic that we suggest you review. Here we will only demonstrate how to use them. Custom roles can be made, giving you granular control over a user’s access to a project. For example, you cna create a role where a user ONLY has permission to modify metadata, but not files.
Typically, you would have to create and name your own roles before assigning them here. However, flywheel does provide three default roles that you can always use: #. admin #. read/write #. read only
Below is a quick example of how to get these default roles and add them to your group. Remember that these roles define the permissions that we can assing users for PROJECTS within this group, and do not directly indicate what permissions a user has regarding what they can do to the GROUP itself.
admin_id = [role.id for role in fw.get_all_roles() if role.default_flywheel_role == 'admin'].pop()
rw_id = [role.id for role in fw.get_all_roles() if role.default_flywheel_role == 'rw'].pop()
ro_id = [role.id for role in fw.get_all_roles() if role.default_flywheel_role == 'ro'].pop()

fw.add_role_to_group(my_group.id, {'_id': admin_id})
fw.add_role_to_group(my_group.id, {'_id': rw_id})
fw.add_role_to_group(my_group.id, {'_id': ro_id})
These are now roles we can assign to users on individual projects within the group.
Any groups you can see here, you have access to or are part of. If you see a group you’d like to use
for your new project, we can grab it using the fw.get() command, and pass in the group ID (printed
using the command above):
my_group = fw.get('group-id')
Or you can create a new group (if you have the correct site permissions): Note that “id” must be a lowercase string with no spaces. It’s a good idea to make this relatively short, as it will be used to access your group programmatically, and no one wants to type out ‘my_very_long_descriptive_group_id’. The group “label” on the other hand can be a human friendly name with spaces.
new_group = flywheel.Group(id='my_id', label='My Label')
my_group_id = fw.add_group(new_group)  # Returns the group id as a string
my_group = fw.get(my_group_id)
Create a new Project
Now that we have our group, let’s add a project to it. If we didn’t just create this group, there may already be projects in it. Let’s check and see what projects exist already, so we know what names we can’t use:
import flywheel

project = my_group.projects()
print(f"GROUP{'':10} PROJECT")
print("----------------------------------")
for project in projects:
    print(f"{project.group:15} {project.label}")
Now let’s choose a name for our new project that doesn’t already exist:
new_project_label = "My New Project"
project = group.add_project(label=new_project_label)
Add a Subject to a Project
Now that we have our new project, let’s add a new subject to it. You can simply specify the label as above, but you can also specify any of the metadata fields covered in the “Subject Object” header of the “Quick Reference” Section. [LLL]. We will take advantage of that and specify the sex and name of this subject:
metadata = {
    'label': 'Subject2',
    'firstname': 'Lisa',
    'lastname': 'Simpson',
    'sex': 'female'
    }

subject = project.add_subject(metadata)
Add a Session to a Subject
We can now add a new session to this subject. We could again use a python dictionary to create this session with metadata already included. Sessions can have the metadata fields specified in the “Session Object” header of the “Quick Reference” section [LLL].:
metadata = {
    'label': 'Session1',
    'age': 20 * 365 * 24 * 60 * 60, # Age in seconds at time of scan
    'weight': 140
    }

session = subject.add_session(metadata)
Add an Acquisition to a Session
Let’s create a simple acquisition to house a simple anatomical T1 image:
In the next section we will upload a file to this acquisition. But before we continue, we will set a unique metadata field to acquisitions: the Timestamp.
Acquisition Timestamp
The acquisition timestamp is a time-zone specific timestamp for when the file within
the acquisition was created, or when the scan took place. This is different from the
Flywheel metadata tags Created and Modified, which refer to when the container
was created and modified in Flywheel. To set the acquisition timestamp, you must know
the time/date/timezome when the data was acquired:
Upload a file to an Acquisition
We are now ready to upload our scan to the acquisition:
file_path = "/path/to/file/T1_Image.nii.gz"
flywheel_file = acquisition.upload_file(file_path)

# In turn, we can download this file as follows:
acquisition.download_file('T1_Image.nii.gz','/path/to/downloaded/file/T1_Image.nii.gz')
Setting file Metadata
If we have metadata on this file (Such as dicom header fields, or any kind of BIDS sidecar
.json file), we can add it to the info section of the flywheel metadata for that file.
this info will be visible in the UI under the “Custom Information” tab. The metadata
must be passed in as a python dictionary. The original format of this data can be arbitrary
(csv, yaml, json, etc), as long as you can load the
# Load in metadata as a python dictionary as key/value pairs.
# This can be any format, but we'll assume we have it saved as a .json file

import json


with open('file_info.json') as json_file:
    metadata = json.load(json_file)

flywheel_file.update_info(metadata)
Uploading a file to any container with metadata
Files can also be uploaded to a container with just the container ID. File Metadata can be uploaded concurrently as a json string with this call as well:
import json

# Get a container ID:
container = fw.subjects.find_first()
container_id = container.id

# Create a Metadata object:
md = {'info':{'hair color':'brown','motion level':'low'}}

# Upload the file with metadata
file = '/path/to/file.nii.gz'
fw.upload_file_to_container(container_id, file, metadata=json.dumps(md))
Uploading many files to an Acquisition
Multiple files can be uploaded by either creating a script with nested for loops, or by
using the fw upload CLI command.
Downloading Data
All containers in Flywheel can be downloaded.
The easiest way to download an entier container is simply to use `download_tar() https://flywheel-io.gitlab.io/product/backend/sdk/branches/master/python/flywheel.html?highlight=download_tar#flywheel.client.Client.download_tar`_ which takes the following arguments:
containers
dest_file
include_types
exclude_types
for example:
fw.download_tar([acquisition], '/tmp/acquisition.tar')
Additionally, you can donwload individual files using the download() function:
files = session.files
file_to_download = files[0]
download_location = f"/tmp/{file_to_download.name}"
file_to_download.download(download_location)