Getting Started With Examples
Prerequisites
Before reading this tutorial you should know a bit of Python. If you would like to refresh your memory, take a look at the Python Tutorial
If you wish to work the examples in this tutorial, you must also have some additional python packages installed on your computer, all of which can be installed with pip:
pip install numpy pandas pytz pathvalidate
**pandas** : a software library written for the Python programming language for data manipulation and analysis
**numpy** : the universal standard for working with numerical data in Python
**pytz** : allows accurate and cross platform timezone calculations
**pathvalidate** : a Python library to sanitize/validate a string such as filenames/file-paths/etc.
NOTE: The examples in this section require python3
Setup
The Flywheel SDK is a python toolbox that provides programmatic access to the Flywheel API endpoints.
Installation
note: you may need root access to complete the installation process
The Flywheel python SDK is a python packaged
that can be installed using pip from the command line.
The SDK is maintained for both python2 and python3, though we recommend using python 3.
To learn more about python package management and pip, go here
Once you have verified that you have python and pip installed on your local machine, open a terminal window and type the following:
pip install flywheel-sdk
you can specify pip2 or pip3 to install for python2.x or python3.x
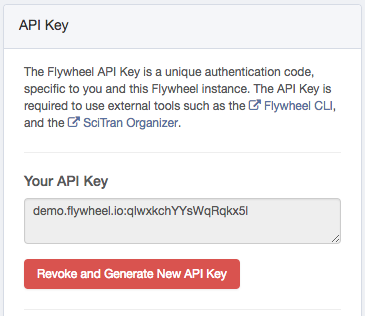
API Key
The SDK requires an API key. You can find and generate your key on the Flywheel profile page. It will look like this:
Connecting to the API Client
In order to make API calls, you will need to connect to the flywheel Client. There are two primary ways to connect to your Flywheel Client:
Connect using your CLI login
If you have already installed the flywheel CLI, and have logged in
(as described here),
then you may access your instance’s API with the command flywheel.Client(), which will
allow you to access your Flywheel instance using the same login credentials and permissions
associated with your current CLI session:
import flywheel
from pprint import pprint

# Access the flywheel API
fw = flywheel.Client()

# Check user Info
user_info = fw.get_current_user()

print(f"Firstname: {user_info.firstname} \n"
      f"Lastname: {user_info.lastname} \n"
      f"Email: {user_info.email}")
Connect using your API key
You can pass your API key directly into the flywheel.Client() command to log in using the account and
credentials associated with that API key. This will override any CLI sessions.
The Flywheel API key is usually of the following format:
<flywheel instance URL>:<numbers_and_letters>
for example:
instance.flywheel.io:abcd1234
This string should be considered like a password, and should be kept secret.
You can log in to the instance associated with this key using the following code:
import flywheel
from pprint import pprint

# Enter your API key into python and pass that
# value in when calling flywheel.Client()
api_key = "<MY_FLYWHEEL_API_KEY>"
fw = flywheel.Client(api_key)

# Check user Info
user_info = fw.get_current_user()

print(f"Firstname: {user_info.firstname} \n"
      f"Lastname: {user_info.lastname} \n"
      f"Email: {user_info.email}")
Examples
The Flywheel API is a powerful data curation and processing tool. Often, users are limited because they are not aware of possible applications. This guide provides examples of possible applications, with links to technical documentation of the individual steps.
Below is a list of Getting Started topics in this tutorial:
Getting Started With The Basics
If you do not already have a solid understanding of the flywheel hierarchy and the containers that reside within it, you can review that information here
Flywheel Containers
Containers can easily be accessed using the SDK. The Flywheel SDK has objects that represent each level of containers on the Flywheel instance:
fw.projects()returns a list of all the projects on the instancefw.subjects()returns a list of all the subjects on the instancefw.sessions()returns a list of all the sessions on the instancefw.acquisitions()returns a list of all the acquisitions on the instance
Each container object consists of two parts:
*Attributes* : These are pre-determined fields present on EVERY container of that type.
For example, all
Sessioncontainers have the attributeage, and allSubjectcontainers have the attributesex
2. *Metadata* : Metadata is a custom field of key/value pairs that customers can modify at will.
Metadata is stored on the container in the field titled info, and anything outside this field
is considered an attribute.
We can see these attributes by simply printing a container object in Flywheel:
import flywheel

fw = flywheel.Client()

subject = fw.subjects.find_first()
print(subject)
Flywheel Hierarchy
The Flywheel container hierarchy is ordered as follows:
Group
Project
Subject
Session
Acquisition
In this hierarchy, each container can only have an immediate parent or child of the container directly above or below. For example, a subject can have an immediate child session, but not an immediate child acquisition - to attach an acquisition to a subject, you must first create a session for that subject, and then attach an acquistion to the session.
Container Patents
One attribute that all Flywheel containers have in the SDK is the parents property.
You can view the parents property with the following call:
import flywheel
fw = flywheel.Clint()

session = fw.sessions.find_first()
print(session.parents)
will return something like the following:
{
    "acquisition": null,
    "analysis": null,
    "group": "scl",
    "project": "5f7b62777f0eb828e102b866",
    "session": null,
    "subject": "5f84ad27f5f90bcf2102b7b8"
}
Since we asked for a session’s parents, it has None for session, aquisition, and analysis.
However, we can use data present in the other containers to work out this container’s place
in the flywheel hierarchy. With the following code, we can map (like a directory tree)
any container to its parent objects:
import flywheel
fw = flywheel.Client()

container_order = ['project','subject','session','acquisition','analysis']

def print_hierarchy(container):

    parents = container.parents
    print_string = f'group: \t\t {fw.get(parents.group).label}\n'
    current_indent = '\t'

    for co in container_order:
        parent = parents.get(co)
        if parent is not None:
            pc = fw.get(parent)
            print_string += f'{co}: {current_indent}   └─> {pc.label}\n'
            current_indent += '\t'

    print_string += f'{container.container_type}: {current_indent}   └─> {container.label}\n'
    print(print_string)
Running this code will yield a tree:
print_hierarchy(acq)

group:      SCL
project:       └─> COVID
subject:               └─> 20201012130928035
session:                       └─> 2020-06-01 13_00_21
acquisition:                                   └─> 1 - Scout
Finding Containers
Containers can be found using finders. Finders come in three flavors:
find()- Finds and returns all containersfind_first()- Finds the first matching containeriter_find()- Finds all containers and returns them one at a time (Better for large numbers of containers)
Finders can be used with or without search criteria. Search criteria can be used to quickly return curated data types. Read more about using finders here.
EXAMPLE: Find all subjects in a project named “Test_Project” over the age of 40
import flywheel

# Access the flywheel client for your instance
fw = flywheel.Client()

# Use finder to locate the project (assumes projects are uniquely named)
project = fw.projects.find_one('label=Test_Project')

# First let's see how many subjects we have total:
n_sub = len(project.subjects())
print(f'{n_sub} subjects total')

# Now use a finder to help filter our results
sub_over_40 = project.subjects.find('info.age>40')

# Also split by sex
male_over_40 = project.subjects.find('sex=male,info.age>40')
female_over_40 = project.subjects.find('sex=female,info.age>40')

print(f'{len(male_over_40)} males over 40')
print(f'{len(female_over_40)} females over 40')
Viewing Containers
Printing an entire container object will display every property on this container, including
custom info and files, which can become lengthy and cumbersome to display.
It’s better to only print the label property of a container (or name property of a file).
EXAMPLE: display all projects in each group
import flywheel

# Access the flywheel client for your instance
fw = flywheel.Client()

# Get all groups for the instance
groups = fw.groups()

# Loop over each group
for group in groups:
    print(f"id: {group.id:12} label: {group.label}:")
    print("--------------------------------------")


    # Get all projects in each group
    projects = group.projects()

    # Loop over all projects and print
    for project in projects:
        print(f"\t{project.label}")

    print('\n')
This will result in an overview that resembles the following:
id: mtsinai   label: Mt_Sinai:
--------------------------------------
    ME_ICA_test
    LC_Model
    Sinai_Hub

id: scien    label: Scientific Solutions:
--------------------------------------
    tome
    Multi-Echo
    MSOT
Creating Containers
Containers can be easily created in the API using one of the following commands:
add_group()add_project()add_subject()add_session()add_acquistiion()
The power of the API lies in its ability to rapidly iterate over lists and add containers. Read more about creating objects :ref:` here <qr-create-objects>`
EXAMPLE: Bulk add a list of subjects and auto-populate a session and acquisition container
In this example, we have a csv file with six columns:
subject ID |
FirstName |
LastName |
sex |
age |
time of scan |
|---|---|---|---|---|---|
sub001 |
Lisa |
Simpson |
female |
34 |
10/03/2019 15:32 |
sub002 |
Bart |
Simpson |
male |
23 |
09/23/2019 12:02 |
… |
… |
… |
… |
… |
… |
subxxx |
This spreadsheet has the following info: - first name - last name - sex - age - time of scan
First name, last name, and sex are subject info, and can go on the subject container.
age (or age at time of scan) is session info, and can go on the session container
time of scan is acquisition info, and can be set as the timestamp of the acquisition.
import csv
from datetime import datetime
import pytz

# Load the subject CSV:
with open('~/Desktop/testcsv.csv') as csvfile:
    csv_reader = csv.DictReader(csvfile, delimiter=',')

    # Get the header
    header = csv_reader.fieldnames
    print(',\t'.join(header))

    # Set the format of the date/time string in the csv file:
    date_format = '%m/%d/%Y %H:%M'

    # Select your timezone (or the timezone that the scans occurred in)
    timezone = pytz.utc

    # Loop through the remaining entries and upload to flywheel
    for row in csv_reader:
        subid = row['Subject ID']
        first = row['FirstName']
        last = row['LastName']
        sex = row['sex']
        age = float(row['age'])
        tos = row['time of scan']

        # Create a datetime object from a string
        tos_date = datetime.strptime(tos, date_format)
        # Attach a timezone
        tos_date = timezone.localize(tos_date)

        # Create subject metadata
        subject_metadata = {
            'label': subid,
            'firstname': first,
            'lastname': last,
            'sex': sex
            }

        # Create session metadata
        # Remember age is stored in seconds on flywheel
        session_metadata = {
        'label': 'Session1',
        'age': age * 365 * 24 * 60 * 60
        }

        # Create acquisition metadata
        acquisition_metadata = {
        'label': 'Struct_T1',
        'timestamp': tos_date
        }

        # Create the containers
        subject = project.add_subject(subject_metadata)
        session = subject.add_session(session_metadata)
        acquisiton = session.add_acquisition(acquisition_metadata)
Getting Started With Metadata Reports
One of the great abilities of the SDK is to rapidly iterate over containers and accumulate metadata, allowing you to then perform computations on the information. In these examples, we will demonstrate iterating over containers in the SDK, and accessing metadata to generate various reports. In this section, we will demonstrate:
How to effectively loop over Subjects/Sessions/Acquisitions in a project
How to generate a demographics report
How to export this data to a csv
How to generate a project overview using Pandas
Extracting Demographics Metadata
Iterating rapidly over all containers can be achieved using the following calls:
project.subjects.iter(): Iterate over all subjects in a projectsubject.sessions.iter(): Iterate over all sessions in a subjectsession.acquisitions.iter(): Iterate over all acquisitions in a session
Combining these in nested for loops can effectively loop over all subjects/sessions/acquistiions in a project:
for subject in project.subjects.iter():
    # Perform task on Subject
    for session in subject.sessions.iter():
        # Perform Task on Session
        for acquisition in session.acquisitions.iter()
            # Perform Task on Acquisition
when using iterators like this, it may be necessary to reload each container with container.reload()
to access certain metadata (such as the custom info).
EXAMPLE: Generating a demographics report and exporting as a csv
import flywheel
import numpy as np
import pandas as pd


fw = flywheel.Client()

# Load the porject of interest:
project_id = '<PROJECT_ID>'

project = fw.get_project(project_id)

# Initialize a dictionary for easy csv export
report = {'subject':[],'age':[],'sex':[]}

# Now loop through subjects in the project:
for subject in project.subjects():
    subject = subject.reload()

    # Get the label:
    report['subject'].append(subject.label)

    # Get the sex
    report['sex'].append(subject.sex)

    # Age is stored on the sessions:
    ses = subject.sessions.find_first()
    ses = ses.reload()

    # Extract the age and append the appropriate value.  Add "nan" if it doesn't
    # Exist.  This allows us to mask for nans later and automatically exclude them
    # From the analysis.  Any other unique value for no age would work (the string "NA" for example)
    if ses:
        age = ses.age_years
        if age:
            report['age'].append(ses.age_years)
        else:
            report['age'].append(np.nan)
    else:
        report['age'].append(np.nan)

# Calculate statistics:
# First get the total number of subjects
n_sub = len(report['subject'])

# Now use numpy's mask feature to mask out any "nans" in the age array
# So that we can calculate the mean and std from the values we DO have
age_no_nans = np.ma.array(report['age'], mask=np.isnan(report['age']))
mean_age = np.mean(age_no_nans)
std_age = np.std(age_no_nans)

# Count the number of male and female subjects
n_male = sum([1 for i in report['sex'] if i=='male'])
n_female = sum([1 for i in report['sex'] if i=='female'])

# Calculate that as a percentage
p_male = n_male/n_sub*100
p_female = n_female/n_sub*100

# Print a summary Report
print(f'Project {project.label} Demographics Summary:')
print(f'---------------------------------------------')
print(f'{"Total Subjects:":20} {n_sub}')
print(f'{"Mean Age + (std) ":20} {mean_age} ({std_age:0.2f})')
print(f'{"Percent female":20} {p_female}')
print(f'{"Percent male":20} {p_male}')

# Now save the report to a csv file using pandas, the easiest way to save this kind of data
# In the format that we want.
csv_file = f"Project_{project.label}_Demographics.csv"
df = pd.DataFrame(report)
df.to_csv(csv_file, index=False)
EXAMPLE: Generate a terminal-friendly project overview
We can use the SDK to generate a terminal-friendly overview of a project in Pandas to display subjects, sessions, and acquisitions. This can be useful for a quick overview of smaller projects, but its real benefit is the pandas dataframe created in the process. Pandas is a powerful database tool that will allow you to perform an number of analyses and statistics on your project.
For example, we can quickly see which subjects are missing acquisitions, if we have a known list of acquisition labels we are expecting.
In this example, we will first generate a Dataframe containing the labels of all acquisitions for every subject, and we will then look for any subjects missing an acquisition.
import flywheel
import pandas as pd

fw = flywheel.Client()

# First generate our "data dictionary" that will contain the values we want to track
# In this case, it's the project/subject/session/acquisition labels
data_dict = {'project':[], 'subject':[], 'session':[], 'acquisition':[]}
project_label = '<PROJECT_LABEL>'

# Get the project
project = fw.projects.find_one(f'label={project_label}')

# Get the subjects in the project as an iterator so they don't need to be returned
# All at once - this saves time upfront.
subjects = project.subjects.iter()

# Loop over the subjects
for sub in subjects:
    # Get the subject label for our data_dict
    sub_label = sub.label

    # Get this subject's sessions as an iterator and loop through them
    sessions = sub.sessions.iter()
    for ses in sessions:
        # Get the session's label for our data_dict
        ses_label = ses.label

        # Get this session's acquisitions as an iterator and loop through them
        acquisitions = ses.acquisitions.iter()
        for acq in acquisitions:
            # Get the acquisition's label
            acq_label = acq.label

            # Update the data dict by appending all values to the lists.
            # By updating these all at once, each index in each array corresponds
            # to one subject/session/acquisition.  This will later be turned
            # Into a pandas dataframe.
            data_dict['project'].append(project_label)
            data_dict['subject'].append(sub_label)
            data_dict['session'].append(ses_label)
            data_dict['acquisition'].append(acq_label)

# Convert the dict to a pandas dataframe
df = pd.DataFrame.from_dict(data_dict)

# Perform a grouping by subject to print an overview of each subject's sessions and acquisitions
grouped_df = df.groupby(['project','subject'])
for key, item in grouped_df:
    print(grouped_df.get_group(key), "\n\n")
This generated the terminal-friendly overview of each subject, that subject’s sessions, and the acquisitions within each session, and will resemble something like the following:
        project subject session                        acquisition
60  BIDS-Sample  sub-01    ses-  task-balloonanalogrisktask_run-03
61  BIDS-Sample  sub-01    ses-  task-balloonanalogrisktask_run-01
62  BIDS-Sample  sub-01    ses-  task-balloonanalogrisktask_run-02
63  BIDS-Sample  sub-01    ses-                                T1w
64  BIDS-Sample  sub-01    ses-                          inplaneT2


        project subject session                        acquisition
65  BIDS-Sample  sub-02    ses-  task-balloonanalogrisktask_run-01
66  BIDS-Sample  sub-02    ses-  task-balloonanalogrisktask_run-03
67  BIDS-Sample  sub-02    ses-  task-balloonanalogrisktask_run-02
68  BIDS-Sample  sub-02    ses-                          inplaneT2
69  BIDS-Sample  sub-02    ses-                                T1w
However, this output still requires manual inspection of the data. To automate the code so that it will identify subjects with missing scans, we can add the following lines to our python script:
# Continuing from the previous example:
# Let's create a list of the expected acquisition labels we should see in every
# Subject/session
expected_acquisitions = [   'task-balloonanalogrisktask_run-04',
                            'task-balloonanalogrisktask_run-03',
                            'task-balloonanalogrisktask_run-01',
                            'task-balloonanalogrisktask_run-02',
                            'inplaneT2',
                            'T1w']


# Group the dataframe by subjects
groupby_subject = df.groupby(['subject'])

# Get a unique list of subjects in the project
subjects = df.subject.unique()

# And create a data dictionary that will contain key/value pairs:
# Keys will be subject ID's, and values will be a list of missing
# acquisitions for that Subject
missing_subjects = {}

# Iterate through each subject
for sub in subjects:
    missing_acq = []

    # Loop over all expected acquisition labels
    for exaq in expected_acquisitions:

        # Check to see if each acquisition label is in that subject's acquisitions
        if exaq not in groupby_subject.get_group(sub)['acquisition'].unique():

            # If it's not in there, append it to our list of missing acquisitions
            missing_acq.append(exaq)

    # If we've found one or more missing acquisition, add an entry to our missing_subject dictionary
    if len(missing_acq) > 0:
        missing_subjects[sub] = missing_acq

# Print a summary of any subjects missing an acquisition
for key,value in missing_subjects.items():
    print(f'\nSubject {key} missing the following acquisitions:')
    for v in value:
        print(f'\t{v}')
which will generate a report as follows:
Subject sub-13 missing the following acquisitions:
    task-balloonanalogrisktask_run-04

Subject sub-14 missing the following acquisitions:
    task-balloonanalogrisktask_run-04
Other examples in this section demonstrate how to generate CSV reports so that this information can be stored in a manageable way.
Getting Started With Quality Control
While the SDK can be used to accumulate basic container attributes, we can also make use of the “custom info” metadata to help us sort and curate data based on any attached information.
MRIQC Gear Output
Our mriqc gear runs basic quality control tests on MRI data, and saves key summary results as metadata to the output file of the analysis. We can examine these values to get an overview of the quality of our data.
EXAMPLE: Get mean FD and tsnr of a project and flag acquisitions with poor values
In this example, we will look at framewise displacement (FD), and the signal to noise ratio (snr) of the MRI data in a project. We will save this information to a Dataframe, generate a csv file export, and print information on any subjects with particularly bad scores.
import flywheel
import pandas as pd

fw = flywheel.Client()

project_id = '<PROJECT_ID>>'
project = fw.get_project(project_id)

# Create a data dictionary that will contain key/value pairs.
# This data dict will eventually become a pandas dataframe.  I just find it easier
# To work with a python dictionary when compiling data.  Each Key in this dictionary
# Will be a column in the dataframe.  The values will be lists.  By appending
# To each list at the same time, we build up row after row of the dataframe.
qc_info = {
           'subject':[],
           'session':[],
           'acquisition':[],
           'file':[],
           'snr':[],
           'mean FD':[],
           'type':[]
           }


# Iterate through the sessions
for session in project.sessions.iter():

    # Iterate through the acquisitions
    for acq in session.acquisitions.iter():
        acq = acq.reload()

        # Find any files that have the string "mriqc.qa" in them, indicating
        # That it's an output report from the mriqc gear.
        qc_files = [file for file in acq.files if 'mriqc.qa' in file.name]

        # In case there are two qc files in an acquisition, only use one.
        # This can be handled differently depending on the project, but in this example
        # There should only be one qc file per acquisition.
        if len(qc_files) > 1:
            qc_files = [qc_files[0]]


        for qc_file in qc_files:
            # Get the subject, session, and acquisition label, as well as the qc filename
            sub_label = session.subject.label
            ses_label = session.label
            acq_label = acq.label
            fname = qc_file.name

            # The qc files have different values based on the scan type.  For example, BOLD
            # Images (T2*) have Framewise Displacement (FD), while Anatomical (T1) does not.

            # If it's a T2*, get the 'snr' measurement, and the FD measurement.

            print(qc_file.classification.get('Measurement'))

            if 'T2*' in qc_file.classification.get('Measurement'):
                qc_info['subject'].append(sub_label)
                qc_info['session'].append(ses_label)
                qc_info['acquisition'].append(acq_label)
                qc_info['file'].append(fname)
                qc_info['type'].append('T2*')

                snr = qc_file.info.get('snr')
                mfd = qc_file.info.get('fd_mean')

                qc_info['snr'].append(snr)
                qc_info['mean FD'].append(mfd)


                # Flag bad data with an appropriate tag if it doesn't meet QC standards:
                if snr < 1.0:
                    acq.add_tag('LOW_SNR')

                if mfd > 2.5:
                    acq.add_tag('HIGH_FD')


            # If it's a T1, get the 'snr_total' value (SNR across all brain tissue types)
            # And since there's no FD, simply put "NA".
            # Remember that we need to append one value to each key in our dict to keep the
            # Length of each array the same.  Otherwise, our subject/session/acquisition labels
            # Will get out of sync with our FD data, and the dataframe will be useless.
            elif 'T1' in qc_file.classification.get('Measurement'):
                qc_info['subject'].append(sub_label)
                qc_info['session'].append(ses_label)
                qc_info['acquisition'].append(acq_label)
                qc_info['file'].append(fname)
                qc_info['type'].append('T1')

                snr = qc_file.info.get('snr_total')
                mfd = 'NA'

                qc_info['snr'].append(snr)
                qc_info['mean FD'].append(mfd)

                if snr < 6.0:
                    acq.add_tag('LOW_SNR')


# Create a dataframe from our data dictionary
df = pd.DataFrame.from_dict(qc_info)

# Save the df as a csv output:
csv_out = 'qc_report.csv'
df.to_csv(csv_out,index=False)
The csv file should resemble something like this:
subject |
session |
acquisition |
file |
snr |
mean FD |
type |
|---|---|---|---|---|---|---|
TOME_3024 |
Session 1 |
T1w_MPR |
T1w_MPR_mriqc.qa.html |
9.873540546610704 |
NA |
T1 |
TOME_3024 |
Session 1 |
rfMRI_REST_PA_Run4 |
rfMRI_REST_PA_18_mriqc.qa.html |
2.183224521929243 |
0.13868297476238717 |
T2* |
TOME_3024 |
Session 1 |
rfMRI_REST_AP_Run3 |
rfMRI_REST_AP_16_mriqc.qa.html |
2.154709083546357 |
0.17400387429216968 |
T2* |
TOME_3024 |
Session 1 |
T1w_MPR_axial |
T1w_MPR_axial_29_mriqc.qa.html |
10.89859083756754 |
NA |
T1 |
TOME_3024 |
Session 1 |
rfMRI_REST_AP |
rfMRI_REST_AP_12_mriqc.qa.html |
2.096035514522938 |
0.193786654994391 |
T2* |
Checking Analysis Status
It’s common to run a generic preprocessing, or first level-analysis gear on Flywheel data. Often, these jobs are launched automatically, or in large batches, meaning that checking on exactly which jobs have finished, have succeeded, or have failed can be a tedious process. In this example, we’ll use the SDK to check and see if the latest run of a gear on a project has succeeded.
EXAMPLE: Check that each session has had a successful run of a certain gear
As in all our examples, we’re generate a report to save as a .csv file, which we can even upload back to Flywheel to maintain a log of these reports.
import flywheel
import pandas as pd
from datetime import datetime

fw = flywheel.Client()

# First configure and get the project you'd like to examine:
project_id = '<PROJECT_ID>'
project = fw.get_project(project_id)

# Now configure the gear you're looking for a successful run of.  For now we
# won't worry about version, we're just interested in the gear name.
gear = 'grp13-container-export'

# Create a data dict:
data_dict = {'subject':[],'session':[],'run':[],'status':[]}


# Iterate over sessions
for session in project.sessions.iter():

    # Because we want information off the sessions's analyses, we need to reload
    # The container to make sure we have all the metadata.
    session = session.reload()

    sub_label = session.subject.label
    ses_label = session.label

    # Any analyses on this session will be stored as a list:
    analyses = session.analyses

    # If there are no analyses containers, we know that this gear was not run
    if len(analyses) == 0:
        run = 'False'
        status = 'NA'

    else:

        # Loop through the analyses
        matches = [asys for asys in analyses if asys.gear_info.get('name') == gear]

        # If there are no matches, the gear didn't run
        if len(matches) == 0:
            run = 'False'
            status = 'NA'

        # If there is one match, that's our target
        elif len(matches) == 1:
            run = 'True'
            status = asys.job.get('state')

        # If there are more than one matches (due to reruns), take the most recent run.
        # This behavior may be modified to whatever suits your needs
        else:
            last_run_date = max([asys.created for asys in matches])
            last_run_analysis = [asys for asys in matches if asys.created == last_run_date]

            # There should only be one exact match
            last_run_analysis = last_run_analysis[0]

            run = 'True'
            status = last_run_analysis.job.get('state')

    # Populate our data dict - remember that each key in the data dict must be updated
    # So that the length of our lists stays the same
    data_dict['subject'].append(sub_label)
    data_dict['session'].append(ses_label)
    data_dict['run'].append(run)
    data_dict['status'].append(status)

# Now create a data frame
df = pd.DataFrame.from_dict(data_dict)

# Append a timestamp to our csv name so it won't overwrite anything when we upload it to flywheel
time_fmt = '%m_%d_%Y-%H_%M_%S'
time_string = datetime.now().strftime(time_fmt)
csv_out = f'{gear}_RunReport_{time_string}.csv'

df.to_csv(csv_out,index=False)

project.upload_file(csv_out)
Which will result in a csv file similar to this:
subject |
session |
run |
status |
|---|---|---|---|
dragon_fruit |
session_1 |
False |
NA |
Tiff |
Tiff |
True |
failed |
DoubleSubject |
DoubleImage |
True |
complete |
bell_pepper |
session_1 |
False |
NA |
bell_pepper |
session_1 |
False |
NA |
bell_pepper |
session_1 |
False |
NA |
dragon_fruit |
session_1 |
False |
NA |
TOME_3024 |
Session 1 |
True |
failed |
no_ext |
no_ext |
True |
failed |
re_ext |
re_ext |
True |
failed |
Getting Started With Curation and Collections
Another way to iterate over containers is to use Flywheel searches and queries. Searches and queries are powerful tools to filter for containers based on certain conditions. In this example we’ll cover both Flywheel finders as well as Flywheel queries, and demonstrate how to use these tools to create collections of data for analysis.
Collections are useful as they allow you to consolidate specific acquisitions from multiple subjects into one place. This makes it easy to process, share, and visualize curated data sets.
Using Finders to Curate Data
Finders allow for searching child containers based on specific criteria. That inherently creates a limitation with finders - to search for all acquisitions with the name “T1_Struct” BUT only if they’re for subjects under 40 years old, this requires two finder searches: the first finds all sessions acquired on subjects under 40 years old, and the second finds all acquisitions with the label “T1_Struct”.
Another limitation is that finders apply to containers, not file objects. Therefore, finding files that match a specific name or type requires additional filtering.
EXAMPLE: Using Finders To Find A Custom Data Set
In this example, we will find all acquisitions in Flywheel that are Structural T1’s of subjects age 20 to 30. This means we must match the following criteria:
Age at time of session is between 20 and 30 years old
acquisition label does not contain the string “SBRef”
file measurement is T1
file intent is Structural
Because session is the highest container in the hierarchy that we have a condition for,
we’ll start our search with that criteria, and then continue to refine down to acquisition
and finally file. We will then add these results to a collection:
import flywheel

fw = flywheel.Client()

matching_acquisitions = []

age_20 = 20*365*24*60*60 # Age is stored in seconds
age_30 = 30*365*24*60*60

meas = ['T1']
intent = ['Structural']

sessions = fw.sessions.find(f'age>={age_20},age<{age_30}')

print(f'Matching Sessions:\t{len(sessions)}')

for ses in sessions:
    acquisitions = ses.acquisitions.find('label=~^((?!SBRef).)*$')
    print(len(acquisitions))

    for acq in acquisitions:
        acq = acq.reload()

        files = acq.files

        for file in acq.files:
            if file.classification.get('Intent') == intent and file.classification.get('Measurement') == meas:
                matching_acquisitions.append(acq)
                break


print(f'Matching Acquisitions:\t{len(matching_acquisitions)}')

# If we got any results
if len(matching_acquisitions) > 0:
    print(f'Creating Colelction SiteWide_structural_decade_20_finder')
    # Create a collection for it
    collection_id = fw.add_collection({'label': 'SiteWide_structural_decade_20_finder'})
    collection = fw.get_collection(collection_id)

    # And populate
    for result in matching_acquisitions:
        collection.add_acquisitions(result.id)
Using Queries to Curate Data
Unlike finders, queries are the SDK extension of the “advanced search”. Unlike finders, we do not need to structure multiple searches to make this work, AND we have access to file information with our query.
EXAMPLE: Using queries To Find A Custom Data Set
In this example, we will repeat the search made above, but with a Flywheel query. As a reminder, we want to find all acquisitions in Flywheel that are Structural T1’s of subjects age 20 to 30. This means we must match the following criteria:
Age at time of session is between 20 and 30 years old
acquisition label does not contain the string “SBRef”
file measurement is T1
file intent is Structural
import flywheel

fw = flywheel.Client()

age_20 = 20*365*24*60*60 # Age is stored in seconds
age_30 = 30*365*24*60*60

meas = 'T1'
intent = 'Structural'

query = f'session.age >= {age_20} AND session.age < {age_30} AND '\
        f'file.classification.Measurement = {meas} AND '\
        f'file.classification.Intent = {intent} AND '\
        f'NOT acquisition.label CONTAINS .*SBRef.*'
print(query)
matching_acquisitions = fw.search({'structured_query': query, 'return_type': 'acquisition'}, size=10000)

print(f'Matching Acquisitions:\t{len(matching_acquisitions)}')

# If we got any results
if len(matching_acquisitions) > 0:
    print(f'Creating SiteWide_Structural_decade_20_query')
    # Create a collection for it
    collection_id = fw.add_collection({'label': 'SiteWide_Structural_decade_20_query'})
    collection = fw.get_collection(collection_id)

    # And populate
    for result in matching_acquisitions:
        collection.add_acquisitions(result.acquisition.id)
There may be slight differences in the number of acquisitions provided by each search. This is because the queries rely on database indexing of these metadata features, and there can be a delay between the creation/modification of this info, and the indexing of the change.
Programmatically Creating Multiple Condition-Based Collections
While creating a single collection can be done easily from the UI using an advanced search, the power of the SDK lies in it’s ability to loop over numerous cases and generate multiple collections of multiple conditions. This can be useful for collecting different types of data for machine learning, or large meta-analysis type studies.
We will expand on the last two examples and use Flywheel queries to programmatically iterate over multiple conditions to create multiple collections:
EXAMPLE: Rapidly Create Multiple Collections With Finders
import flywheel
fw = flywheel.Client()

# A list of the items we wish to loop through
decades = [20,30,40,50,60]
measurements = ['T2*, BOLD','T1']
intents = ['Functional','Structural']
# Calculate one decade in seconds
one_decade = 10 * 365 * 24 * 60 * 60

# Loop over the decades
for decade in decades:
from_age = decade * 365 * 24 * 60 * 60
to_age = from_age + one_decade - 1

# Loop Over The Measurements
for measurement, intent in zip(measurements, intents):

    query = f'session.age >= {from_age} AND session.age <= {to_age} AND '\
            f'file.classification.Measurement IN [{measurement}] AND '\
            f'file.classification.Intent = {intent} AND '\
            f'file.classification.Features != SBRef AND '\
            f'NOT acquisition.label CONTAINS .*SBRef.*'

    results = fw.search({'structured_query': query, 'return_type': 'acquisition', 'all_data':True}, size=10000)

    # If we got any results
    if len(results) > 0:
        print(f'Creating SiteWide_{intent}_decade_{decade}')
        # Create a collection for it
        collection_id = fw.add_collection({'label': f'SiteWide_{intent}_decade_{decade}'})
        collection = fw.get_collection(collection_id)

        # And populate
        for result in results:
            collection.add_acquisitions(result.acquisition.id)
Getting Started With DataViews
In previous examples, we’ve demonstrated that valuable metadata can be stored on files/acquisitions in Flywheel, and how to access and download that metadata via the SDK. However, one downside to that method is that the results cannot be easily viewed until a .csv file is saved to your local machine. One Flywheel feature that allows you to view metadata summaries on the UI itself, and to easily export a metadata summary, is DataViews.
DataView Functionality
A DataView is ultimately going to render a spreadsheet-like report. This report will be made of columns, each populated by a certain piece of data. In the SDK, we must declare what these columns will be, and what information to populate them with. Once created, these a DataView can be run on multiple projects easily. This can be a quick way to collect demographics, scan stats, or any other metadata of interest.
EXAMPLE: Collect Scan Parameters from all fMRI acquisitions images
For this example, let’s collect scan information - Echo Time, Repetition Time, and Flip Angle, for any fMRI scan. We’ll filter for fMRI scans by only retrieving the information from an acquisition if the file name has “fMRI” in it.
import flywheel
import pandas as pd

fw = flywheel.Client()


# First create the columns.  These columns will be:
# 1. The Project Label
# 2. The Subject Label
# 3. The Session Label
# 4. The Acquisition Label
# 5. The Echo Time
# 6. The Flip Angle
# 7. The Repetition time

# Each Column will be a python dictionary with three keys:
# 1. "dst": The description (or label) of the column header.
# 2. "src": The {Container}.{field} source of the information to put in the column
# 3. "type": the datatype that this column should be on export


columns = [{'dst': None, 'src': 'project.label', 'type': None}, # Our First Column for subject label
           {'dst': None, 'src': 'subject.label', 'type': None}, # Our Next Column for subject label
           {'dst': None,  'src': 'session.label', 'type': None},  # Our Next Column for session Label
           {'dst': None,  'src': 'acquisition.label', 'type': None}, # Our Next column for acquisition label
           {'dst': 'Echo Time', 'src': 'file.info.EchoTime', 'type': None}, # Our Next column for echo time
           {'dst': 'Flip Angle', 'src': 'file.info.FlipAngle', 'type': None}, # Our Next column for Flip Angle
           {'dst': 'TR', 'src': 'file.info.RepetitionTime', 'type': None}]    # Our last column for TR


# Use the flywhel ViewBuilder to help with creating a DataView
# Initialize with the dataview label, the container we'll be using to find our files,
# The match scheme (first, last, newest, oldest, all) in the event of multiple file matches
# process_files (which will load csv files and process labeled rows)
# include ID's, which will store container ID's
# And include Labels, which will store container labels.  Since we are already
# Specifying the labels we want in our columns, there is no need to include this.
builder = flywheel.ViewBuilder(label='fMRI_scan_parameters',
                               container='acquisition',
                               match='all',
                               process_files=False,
                               include_ids=False,
                               include_labels=False)

# Add the columns described above
for c in columns:
    builder.column(**c)

# set a few more options:
# 'filter': A filter to apply to the files - in this case only run on files that have the string
# "fMRI" and end in ".dcm.zip"
builder.file_filter(value='*fMRI*.dcm.zip')

# 'container': The type of container that this DataView is running on
# ( In other words, where it will be looking for the files to get file.info.EchoTime)
# Should be the same as "container" above
builder.file_container('acquisition')

# 'missing_data_strategy' - what to do if the value we're looking for isn't there.
# Usually filled with "None", but in this case we want to drop the row.
builder.missing_data_strategy('drop-row')

# Build the DataView
sdk_dataview = builder.build()


# Now we can run this rapidly over every project on the Flywheel Instance:
main_df = None

for project in fw.projects.iter():
    id = project.id
    df = fw.read_view_dataframe(sdk_dataview, id)

    project_label = project.label

    output_file = f'{project_label}_DataView_Report.csv'
    fw.save_view_data(sdk_dataview, id, output_file, format='csv')

    print(df.shape)
    if main_df is not None:
       main_df = main_df.append(df, ignore_index=True)
    else:
        main_df=pd.DataFrame(df)
Reading Data from .CSV files in Flywheel
Reading metadata is useful, however that can already be done easily with the SDK. One advantage of DataViews is that it can read into files stored on Flywheel, and if in the right format, can extract information from columns in those files.
This is particularly useful for extracting data from the output of gears - if a summary.csv file is saved somewhere (say, a summary of brain region volumes after anatomical processing), a summary of every subject’s brain volume can easily be generated. Better still, this can rapidly be run on every project, collecting things like subject age and other metadata fields for further processing.
Getting Started With Automating Gears
While gears can be set up to run automatically as Gear Rules, there are situations where these rules cannot address the needs of the users. For example, gears launched by gear rules cannot have API write permissions. Nor can they run on a gear that uses more than one variable input. The SDK can help work around these problems.
Batch Launching Gears
Some gears like freesurfer recon-all can take numerous anatomical T1 and T2 images. Since these would all be variable inputs, it not be able to run as a gear rule. However, with the SDK we can programmatically set up and run this gear.
EXAMPLE Run Freesurfer recon-all on all subjects, and auto-populate extra T1/T2 inputs if present
For this example, we’ll assume that the default config settings are good enough and leave them as is, while we’ll focus on finding and entering the anatomical scans as inputs:
import flywheel
from datetime import datetime

fw = flywheel.Client()

project_id = '5db0759469d4f3001f16e9c1'
project = fw.get_project(project_id)

reconall_gear =  fw.lookup('gears/freesurfer-recon-all')

# It's good to know ahead of time that this gear can take up to 5 T1 and 1 T2 weighted
# Images.  Also good to have their input names known.  This can be found in the manifest,
# Usually present in the gear's github repository:

# We need a way to know which input to populate first for the T1's.
# An ordered Dict would be another way.

input_order = ['anatomical','t1w_anatomical_2','t1w_anatomical_3','t1w_anatomical_4','t1w_anatomical_5']

 # Initialize gear_job_list
job_list = list()


# Because this is anatomicals PER subject, we'll collect T1's and T2's over subjects:
for subject in project.subjects.iter():

    # Initialize some values
    current_anat = 0
    have_T2 = False
    full_T1 = False
    inputs = {}

    # The only way to get to acquisitions is to go through the sessions

    for session in subject.sessions.iter():
        for acq in session.acquisitions.iter():
            # Now we have to look at every file in every acquisition
            # On every session.

            for file_obj in acq.files:
                # We only want anatomical Nifti's
                if file_obj.type == 'nifti' and 'Structural' in file_obj.classification.get('Intent'):

                    # If we don't already have all our T1's, add this if it's a T1
                    if not full_T1 and file_obj.classification.get('Measurement') == ['T1']:
                        input_label = input_order[current_anat]
                        inputs[input_label] = file_obj
                        current_anat += 1

                        # If our current anat input is number 4, we're full
                        if current_anat > 4:
                            full_T1 = True

                    # If we don't already have all out T2's and this is a T2, add it
                    if not have_T2 and file_obj.classification.get('Measurement') == ['T2']:
                        input_label = 't2w_anatomical'
                        inputs[input_label] = file_obj

                        # And make sure to set "Have T2" to True so we know we already have this input
                        have_T2 = True

            # After running through all the files in an acquisition, check and see
            # if we have all we need (unlikely for an acquisition)
            if have_T2 and full_T1:
                break

        # After running through all acquisitions in a session, check to see if we have all we need
        if have_T2 and full_T1:
            break


    # The destination for this anlysis will be on the subject
    dest = subject
    time_fmt = '%d-%m-%Y_%H-%M-%S'
    analysis_label = f'Freesurfer_Recon_all_{datetime.now().strftime(time_fmt)}'
    job_id = reconall_gear.run(analysis_label=analysis_label, inputs=inputs, destination=dest,config={'gear-FREESURFER_LICENSE':''})
    job_list.append(job_id)
Getting Started With File Management
There may be many reasons to upload or download files from Flywheel. Bulk downloading of entire containers is easily doable through the CLI, but what about downloading specific files across all subjects? Or from all of the latest run of a certain gear across sessions? Once again, the SDK is the right tool for the job.
Downloading specific files
In previous examples, we saved key values from a quality control gear. But what if you need a record of the full quality control report on your local computer?
EXAMPLE: Download a QC file from a gear for all subjects in a project
In this example, we’ll iterate over all subjects/sessions/acquisitions in a project, generate a file tree on our local machine to correspond to that hierarchy, and download the freesurfer output summary report html file from the latest run of the “bids-freesurfer” gear. The output of this gear is one large zipped output. Let’s say that we only are interested in one of the summary stat files present in the zip file. We’ll use the zipmember tools to download “aseg.stats” to our machine.
This gear is run at the subject or session level, but we’ll look for the ones run on sessions.
/Users/davidparker/Downloads/5dee7faaf999360017e1a20c/sub-TOME3024/stats/aseg.stats
import flywheel
from pathlib import Path
import shutil
import pathvalidate as pv

fw = flywheel.Client()

project_id = '5dc091c169d4f3002d16f32f'
project = fw.get_project(project_id)

# Create a work directory in our local "home" directory
work_dir = Path(Path.home()/'Documents/Flywheel_QCreport', platform='auto')

# If it doesn't exist, create it
if not work_dir.exists():
    work_dir.mkdir(parents = True)

# Create a custom path for our project (we may run this on other projects in the future) and create if it doesn't exist
project_path = pv.sanitize_filepath(work_dir/project.label, platform='auto')
if not project_path.exists():
    project_path.mkdir()

# Set the gear we're looking for
gear = 'bids-freesurfer'

# We can loop over sessions (and skip subjects), because the subject parent info is stored on the session if we need it,
# AND the analysis of interest is stored on the session itself.
for ses in project.sessions.iter():
    ses_label = ses.label
    sub_label = ses.subject.label

    # Make sure we have all our analysis since we got the session through an iterator, and not "fw.get()'
    ses = ses.reload()
    analyses = ses.analyses

    # If there are no analyses containers, we know that this gear was not run. Move on to the next session
    if len(analyses) == 0:
        continue

    # Otherwise there are analyses containers
    else:
        print(f'{ses.label} has analysis')

        # Check to see if any were generated by our gear
        matches = [asys for asys in analyses if asys.gear_info.get('name') == gear]

        print(f'{len(matches)} matches in {[asys.label for asys in analyses]}')
        # If there are no matches, the gear didn't run
        if len(matches) == 0:
            continue

        # If there is one match, that's our target
        elif len(matches) == 1:
            match = matches[0]

        # If there are more than one matches (due to reruns), take the most recent run.
        # This behavior may be modified to whatever suits your needs
        else:

           # Loop through the analyses and first make sure we only look at successful runs
            matches = [asys for asys in matches if asys.job.get('state')=='complete']
            print(f'{len(matches)} completed matches')

            # Now find the max run date (most recent), and extract the analysis that has that date.
            last_run_date = max([asys.created for asys in matches])
            last_run_analysis = [asys for asys in matches if asys.created == last_run_date]

            # There should only be one exact match.  If there are two successful runs that happened at the same time,
            # Something is strange...just take one at random.
            match = last_run_analysis[0]


        status = match.job.get('state')
        # If the status is complete, look for the output file:
        if status == 'complete':
            # Put the download section within a "try" loop in case there are API errors downloading.
            try:
                # Reload the match and let's look at the files
                match = match.reload()
                files = match.files

                # In case there are more files (there shouldn't be), find the one that's
                # A zip archive.
                if len(files) > 1:
                    files = [f for f in files if f.mimetype == 'application/zip']

                # Exctract the file object
                file = files[0]
                # Get it's name
                fname = file.name

                # Get the zip members.  We're looking for one particular file called "aseg.stats", but the actual
                # Directory may be different from subject to subject, as the parent directories have subject ID's in their name
                zip_info = match.get_file_zip_info(fname)['members']

                # We'll identify any strings that have this aseg.stats string in them
                file_of_interest = [a['path'] for a in zip_info if '/aseg.stats' in a['path']]

                # If we found some (There should be one), set that as our file of interest.
                if len(file_of_interest) > 0:
                    file_of_interest = file_of_interest[0]
                else:
                    print(f'No Summary Stats found for {sub_label} {ses_label} {match.label}' )
                    continue

                ## NOTE: Many assumptions, such as knowing there should be only one of this kind of file,
                ## Result from a familiarity with a typical output from this gear.  If YOUR gear has multiple files
                ## That would match your search string, this strategy must be changed.  Knowing and understanding
                ## The output of a gear allows you to make simplifying assumptions like these.

                # Sanitize our filename and parent path
                download_name = Path(pv.sanitize_filename(f'{match.label}_aseg.stats'),platform='auto')
                download_dir = pv.sanitize_filepath(project_path/sub_label/ses_label,platform='auto')

                # Create the path
                if not download_dir.exists():
                    download_dir.mkdir(parents=True)

                download_path = download_dir/download_name

                # Download the file
                print('downloading file')
                match.download_file_zip_member(fname, file_of_interest, download_path)

            # Alert the user of any exceptions.
            except Exception as e:
                print('Error Downloading File')
                print(e)
Uploading specific files
It’s common for there to be additional files associated with subjects besides just their scans. These files can be uploaded directly to any container, and will appear under then “attachments” section (Except for acquisitions - Files attached to an acquisition appear under the acquisition, just like a typical scan would).
Any filetype can be attached to a container, making it a flexible solution for any additional data you need to keep associated with your subjects
EXAMPLE: Upload a pdf consent form to each subject in Flywheel
In this example, assume that each consent form has the subject ID in the filename:
<SUBJECT_ID>_ConsentForm.pdf, in a consent form directory.
ConsentForms/
   ├── <SUBJECT_1>_ConsentForm.pdf
   ├── <SUBJECT_2>_ConsentForm.pdf
   ├── <SUBJECT_3>_ConsentForm.pdf
   ---
   └── <SUBJECT_N>_ConsentForm.pdf
All we need to do is loop over every file in this directory, extract the subject ID, and upload to Flywheel. We’ll include some checks to ensure that the file is a pdf, that it matches the expected naming format, and that the extracted subject ID exists in Flywheel.
We’ll also print a message if a subject already has a consent form uploaded.
import flywheel
from pathlib import Path

fw = flywheel.Client()
project_id = '<PROJECT_ID>'
project = fw.get_project(project_id)

work_dir = Path('~/Documents/Master_lists')

# We Could just search for files ending in "_ConsentForm.pdf", but what if there
# Was a mistake in naming a file?  We would like to see that and print a message.
# To do that we'll grab every file that is a pdf and then decide if it matches our
# Pattern or not:
# This glob string will capture all files that are are pdfs
pdfs = work_dir.glob('*.pdf')

stem = "_ConsentForm.pdf"
l_stem = len(stem)


for pdf in pdfs:

    # Now we check if it ends with our expected "_ConsentForm.pdf"
    if pdf.name.endswith(stem):
        # If it does extract our subject ID.  In our current scheme we're assuming everything before
        # "_ConesntForm.pdf" is the subject ID.  If a more complicated file name is used, regular expressions
        # Can help extract the subject ID.
        subject_id = pdf.name[:-l_stem]

        # If we can find a subject with this label
        print(f'Looking for subject {subject_id}...')
        try:
            subject = project.subjects.find_one(f'label={subject_id}')
        except Exception as e:
            print(e)
            print(f'Error locating subject with ID {subject_id} for file {pdf.name}')

            # OPTIONAL: Create a subject container if it doesn't exist
            # First check to see if the subject_id is actually present, and create
            # if len(subject_id) > 0:
            #     print('Creating Subject')
            #     subject = project.add_subject(label=subject_id)
            # Note that you should remove the "continue" below if you do this.
            continue

        # Reload the subject and get its files
        subject = subject.reload()
        files = subject.files

        # Check to see if any files are named the same as this consent form
        if any [f.name==pdf.name for f in files]:
            # If we find one, skip
            print(f'Subject {subject_id} already has a consent form file. Skipping')
            continue

        # Try to upload the file, and log any errors
        try:
            subject.upload_file(pdf)
        except Exception as e:
            print(e)
            print(f'Error Uploading File {pdf}')

    else:
        # If the file doesn't end in "_ConsentForm.pdf", just log it so the user knows there's a strangely named file
        print(f'File {pdf.name} is present but does not match the naming scheme.')
Managing Gear Permissions/Access
Note
Gear permissions can currently only be managed users with the site-admin or developer role.
Gear access specifies whether given users and/or projects can: * run a gear * set a gear rule
Gear access is managed via the permissions and is_restricted attributes of a gear series (representation of the gear across all versions).
If is_restricted is False for a given gear series, then the series permissions will not be evaluated.
A gear series’ permissions defines what projects and/or users can access the gear.
If all permissions are deleted via fw.delete_gear_permissions, then is_restricted will be set to False for the gear series
import flywheel

fw = flywheel.Client()

# Get the latest version of the example gear
    gear = fw.lookup('gears/flywheel-example-gear')

# get gear series
gear_series = gear.get_series()
print(gear_series)

# replace permissions
permissions = {"projects": ["abcdefabcdefabcdefabcdef"], "users": []}
gear_series = fw.replace_gear_permissions(gear.name, permissions)

# restrict gear so permissions are evaluated
gear.modify_gear_series({"is_restricted": True})

# add project permission
gear_series = fw.add_gear_permission(
    gear.name, "projects", {"id": "fedcbafedcbafedcbafedcba"}
)

# add user permission
gear_series = fw.add_gear_permission(
    gear.name, "users", {"id": "support@flywheel.io"}
)

# remove user permission
gear_series = fw.delete_gear_permission(
    gear.name, "users", "support@flywheel.io"
)

# remove all permissions
fw.delete_gear_permissions(gear.name)
gear_series = fw.get_gear_series(gear.name)
# illustrate changes
assert gear_series.permissions is None
assert gear_series.is_restricted = False